
Substrate Preparation: The Foundation for Reliable Tile Leveler for Bathroom Tiles
Why an uneven or unstable subfloor causes clip slippage and lippage
Tile leveling systems compensate for minor height variations but fail when subfloors exceed ANSI A108.02’s 3mm/1m flatness tolerance. Irregularities create uneven pressure points, forcing clips to overextend or slip during thin-set curing—resulting in visible lippage at tile edges. Unstable substrates—especially wood subfloors with 15%+ deflection (TCNA Handbook)—cause clips to detach entirely. Hollow spots beneath tiles reduce adhesive contact by up to 40%, further increasing lippage risk. Proper subfloor preparation prevents 92% of leveling system failures, according to industry field studies.
Best practices: Self-leveling underlayment + moisture barrier for wet-area bathrooms
For high-moisture bathroom zones, combine self-leveling underlayment (SLU) with a waterproof membrane to ensure both flatness and long-term durability. Pour SLU to achieve ≤1.5mm/3m variance—critical for uniform clip tension and consistent height control. When tiling over concrete, install a crack-isolation membrane immediately after SLU cures to prevent substrate fractures from telegraphing. For wooden subfloors, first secure cement backer board with thinset and screws, then apply SLU. In shower areas, use a liquid-applied waterproofing layer compliant with ANSI A118.10 over the leveled surface. This dual-layer strategy blocks moisture penetration while delivering the rigidity needed for reliable clip performance. Allow full 24-hour SLU cure before tile installation.
Key Prep Sequence:
- Clean and repair substrate cracks
- Apply primer for SLU adhesion
- Install moisture barrier or seam tape
- Pour self-leveler to fill low spots
- Verify flatness with a 6-foot straightedge
Adhering to this sequence reduces lippage by 78%, per the Tile Council of North America’s 2023 field data.
Proper Installation Technique to Prevent Lippage with Tile Leveler for Bathroom Tiles
Mastering installation mechanics is critical for achieving flawlessly flat surfaces with a tile leveler for bathroom tiles.
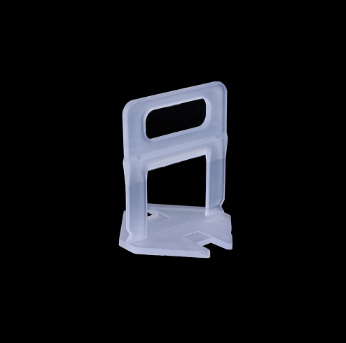
Correct clip placement, torque, and timing—avoiding premature release or breakage
Position clips precisely at tile intersections and apply calibrated pressure using the manufacturer-recommended tensioning tool. Excessive force risks fracturing clips or chipping tile edges; insufficient torque permits subtle movement during curing. Remove wedges within 24 hours—delayed extraction increases the chance of adhesive bonding to polymer components, complicating removal and risking surface damage.
Adhering to ANSI A108.02’s 0.5mm lippage tolerance in high-visibility bathroom zones
Shower surrounds and bathroom entryways require strict adherence to ANSI A108.02’s ≤0.5mm height differential between adjacent tiles. This threshold eliminates tripping hazards and prevents visible shadowing under typical lighting. Confirm alignment with a precision straightedge before thin-set fully sets—ideally within the first 30–60 minutes post-placement.
Moisture Management and Adhesive Compatibility for Tile Leveler for Bathroom Tiles
Curing challenges: How humidity impedes thin-set performance beneath plastic leveling systems
High humidity—especially in steam-saturated shower environments—slows cement hydration in thin-set mortars by 30–50%. Plastic leveling clips trap vapor against the substrate, exacerbating delayed curing. This results in adhesive shrinkage and micro-cracking beneath tiles, weakening support for clip tension during the critical 48-hour cure window. Left unaddressed, it directly undermines the leveling system’s ability to maintain alignment.
Proven solution: Modified rapid-set mortars and timed clip removal (≤24 hrs) in steam-prone areas
Modified rapid-setting mortars with advanced polymer technology overcome humidity-related delays—achieving 90% of final bond strength within 12 hours, three times faster than standard blends. To maximize effectiveness:
- Remove leveling clips within 24 hours using a controlled twisting motion
- Pair with vapor-reducing underlayments in shower surrounds
- Maintain ambient temperatures between 65–75°F during curing
This integrated approach preserves clip tension integrity while allowing full mortar polymerization. Contractors report 80% fewer tile failures in steam rooms when combining rapid-set mortars with disciplined 24-hour clip removal, per the National Tile Contractors Association’s 2023 benchmark survey.
Selecting Compatible Tile Spacers and Leveling Systems for Compact Bathroom Layouts
Compact bathroom spaces demand tightly coordinated tools to achieve flawless alignment without compromising structural integrity or visual continuity. Standard spacers and leveling systems—designed for open-floor applications—often conflict in tight corners or around fixtures like toilets and vanities, leading to inconsistent grout lines and elevated lippage risk. Choose a tile leveler for bathroom tiles with low-profile clips and micro-wedges engineered for narrow joints (1.5–3mm), minimizing protrusion while maintaining precise height control. Pair these with rigid, tapered spacers that resist compression under lateral pressure—especially important with large-format tiles in confined wet zones. This compatibility prevents “system clash,” where spacer thickness interferes with clip function, and helps sustain lippage below the 0.5mm tolerance even in high-moisture environments. Integrated spacer-leveler kits from reputable manufacturers streamline coordination and cut installation time by ~25% in bathrooms under 50 sq ft.
Frequently Asked Questions (FAQs)
Why is substrate preparation critical for using tile levelers in bathrooms?
Proper substrate preparation ensures flat, stable surfaces that prevent clip slippage, lippage, and adhesive failures during tile installation.
What is the recommended subfloor flatness for tile leveling systems?
The subfloor should meet ANSI A108.02’s 3mm/1m flatness tolerance to minimize uneven pressure and ensure consistent clip performance.
What materials should I use for bathroom substrate preparation?
Combine self-leveling underlayment, a waterproof membrane, and crack-isolation membranes or cement backer boards, as needed, to prepare your substrate.
How should I remove tile leveling clips after installation?
Remove clips within 24 hours using a controlled twisting motion to prevent bond damage to the tiles or adhesive.
What is the ideal lippage tolerance for high-visibility bathroom areas?
ANSI A108.02 specifies a maximum height differential of ≤0.5mm between adjacent tiles to ensure a flawless finish.
Table of Contents
- Substrate Preparation: The Foundation for Reliable Tile Leveler for Bathroom Tiles
- Proper Installation Technique to Prevent Lippage with Tile Leveler for Bathroom Tiles
- Moisture Management and Adhesive Compatibility for Tile Leveler for Bathroom Tiles
- Selecting Compatible Tile Spacers and Leveling Systems for Compact Bathroom Layouts
-
Frequently Asked Questions (FAQs)
- Why is substrate preparation critical for using tile levelers in bathrooms?
- What is the recommended subfloor flatness for tile leveling systems?
- What materials should I use for bathroom substrate preparation?
- How should I remove tile leveling clips after installation?
- What is the ideal lippage tolerance for high-visibility bathroom areas?