 EN
EN

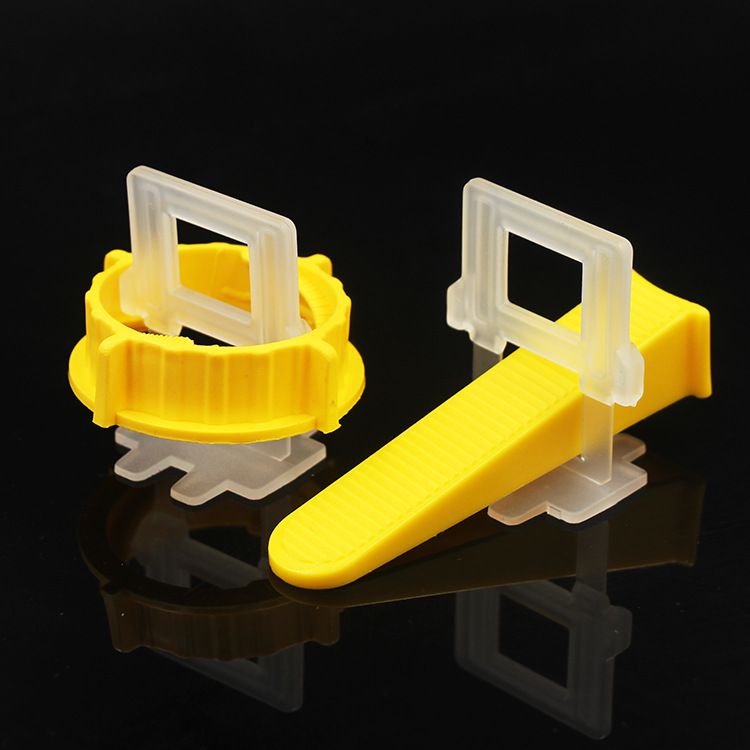
Why Tile Leveler Is Essential for Lippage-Free, Professional-Quality Tile Installation
Tile lippage—the uneven edge height between adjacent tiles—compromises both visual appeal and safety. According to a 2023 industry analysis by the Tile Council of North America (TCNA), over 35% of residential tile installation defects are linked to lippage, often triggering costly rework. Even minor deviations cast shadows, reduce perceived floor flatness, and create tripping hazards—violating ANSI A108.02 standards, which permit no more than 1/32 inch of lippage for grout joints under 1/4 inch.
A tile leveler is a precision tool that interconnects tiles during adhesive curing, applying consistent downward pressure to keep surfaces flush. Unlike manual adjustment—which relies on subjective feel—the leveler’s clip-and-wedge design prevents mortar displacement and minimizes settling shrinkage. This mechanical hold delivers lippage-free results, even on substrates with minor irregularities, and is especially critical for large-format tiles, where inherent warpage demands tighter control.
Beyond flatness, the leveler accelerates installation by eliminating repeated stops to re-level individual tiles—shaving up to 30% off project time. For contractors, that means fewer callbacks and a stronger professional reputation. DIY installers gain factory-flat finishes without guesswork. Integrating a tile leveler into the workflow is the surest foundation for durable, flawless, and professional-quality installations.
How to Use Tile Leveler Correctly: Step-by-Step Installation Protocol
Substrate preparation and mortar selection for optimal tile leveler performance
The substrate must be clean, dry, and flat—any irregularities exceeding 1/8 inch over 10 feet will undermine leveling results. Measure flatness using a straightedge and fill low spots. Wood subfloors require deflection-free reinforcement, typically with cement backer board. In wet areas, apply a waterproofing membrane before tiling. Mortar selection depends on tile type and substrate: use polymer-modified thin-set for porcelain or large-format tiles on concrete; unmodified mortar is appropriate for uncoupling membranes. Choose the correct trowel notch size—1/2″ × 1/2″ for large-format tiles—and always back-butter tiles to ensure full coverage and adhesion. As the TCNA Handbook states, 80% of tile failures stem from inadequate substrate preparation, underscoring that even the best tile leveler cannot compensate for a poorly prepared base.
Clip placement, tightening sequence, and removal timing—avoiding micro-fractures and mortar displacement
Position clips at each tile corner, approximately 2 inches from edges. For tiles longer than 15 inches, add intermediate clips every 8–12 inches to maintain uniform pressure. Slide clips under the first tile before setting the adjacent tile. After placing the adjacent tile, insert wedges through the clip slots and tighten gradually with leveling pliers—alternating between clips to avoid uneven stress that can cause lippage. Over-tightening risks tile deformation and micro-fractures. Allow the thin-set mortar to reach initial set before removing wedges; consult the mortar manufacturer’s cure specifications—some rapid-set formulations permit removal in as few as 4 hours. Premature clip removal risks bond breakage and tile shifting. To remove breakaway clips, strike them gently with a rubber mallet parallel to the floor, shearing cleanly at the score line; never pull upward, as this displaces mortar and compromises adhesion.
Tile Leveler Best Practices for Ceramic vs. Large Format Tiles
Ceramic tile leveling: managing thermal expansion and edge support with precision clips
Ceramic tiles—particularly in environments with temperature fluctuations—require levelers that accommodate natural expansion without stressing edges. Use slim-profile, side-gripping clips to avoid glaze chipping; never grip the tile face. Incorporate a perimeter expansion joint and select a flexible, polymer-modified mortar where movement is expected. Place clips strategically along each side to distribute tension evenly and minimize micro-fracture risk. Maintain consistent joint width aligned with the tile manufacturer’s grout-line specification. Controlled field tests on 12×12 inch ceramic installations show this method reduces height discrepancies by roughly 50% compared to manual alignment alone.
Large format tile leveling: clip density, deflection control, and ASTM C1088 compliance
Large format tiles (any side >15 inches) magnify challenges from deflection and inherent warpage. An effective leveler must deliver dual-axis pressure—pushing down while resisting lateral shift—until the mortar fully cures. Clip density is foundational: use at least two clips per side for tiles up to 24×24 inches, and three or more for 24×48 inch and larger formats. This spacing prevents corner curl and ensures full contact with the mortar bed. Select clips with high tensile strength to resist snapping under tile weight. Insist on systems engineered to meet ASTM C1088 lippage limits—≤1/32 inch per 10 feet of surface. Industry data shows dual-force levelers reduce height variation by 83% on 900 mm tiles. Always back-butter large-format tiles to eliminate voids and ensure complete mortar coverage before tightening clips.
FAQ Section
What is tile lippage, and why is it a concern?
Tile lippage refers to the uneven height between adjacent tiles. It can reduce visual appeal, create tripping hazards, and lead to costly rework if it exceeds standards set by ANSI A108.02.
How does a tile leveler prevent lippage?
A tile leveler uses mechanical pressure with its clip-and-wedge design, ensuring tiles stay flush during adhesive curing even on irregular substrates.
Can a tile leveler speed up installation?
Yes, a tile leveler eliminates the need for repeated adjustments, reducing overall project time by up to 30%.
What preparation steps are essential before using a tile leveler?
The substrate must be clean, flat, and dry, with any irregularities addressed. Proper mortar selection and back-buttering of tiles are also crucial.
Are there different leveling techniques for ceramic vs. large-format tiles?
Yes, ceramic tiles require precision clips that manage thermal expansion, while large-format tiles need higher clip density and dual-axis pressure to counter deflection and warpage.
