 EN
EN

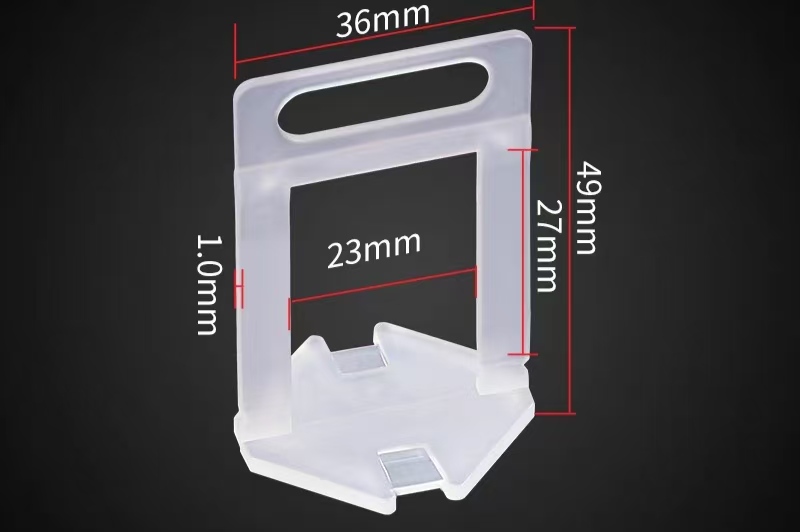
Understanding Tile Leveler Kit Fundamentals and Core Functionality
How Tile Leveler Kits Eliminate Lippage Through Controlled Vertical Force
Tile leveler kits prevent lippage—the uneven height between adjacent tiles—by applying precise, controlled vertical force during adhesive curing. Unlike traditional spacers that only manage horizontal gaps, these systems actively pull or press tile edges into the same plane. When the wedge, cap, or strap is tightened, it generates downward pressure that forces alignment across the joint. This mechanical action locks tiles at a uniform level while thinset or mortar cures, delivering a consistently flat surface without reliance on manual fine-tuning—even for beginners.
Key Components Explained: Clips, Strips, Caps, and Pliers — What Each Does
Most tile leveler kits share four essential components:
- Clips (or bases) slide under adjacent tile edges and feature a slot or post to accept the tensioning element.
- Strips, used in strap-based systems, are flat, flexible bands that lie beneath tiles and extend upward for the cap to grip.
- Caps, common in spin-cap systems, thread onto a post and twist down to apply calibrated vertical force.
- Pliers provide the final, consistent tension needed to lock wedges into clips—or snap caps securely—ensuring reliable alignment across large surfaces.
Together, these parts form a cohesive, reusable or disposable assembly engineered for repeatable, professional-grade results.
Matching the Tile Leveler Kit to Your Tile Type and Format
Ceramic, Porcelain, and Natural Stone: Thickness, Warpage, and Adhesion Considerations
Selecting the right tile leveler kit starts with matching clip thickness to your tile’s physical characteristics. Ceramic tiles (6–10 mm thick) are dimensionally stable and work well with standard 1–2 mm clips. Rectified porcelain tiles have tighter tolerances but may still exhibit subtle warpage; kits with adjustable clamping force help correct lippage without risking tile stress. Natural stone—including marble, slate, and travertine—varies widely in thickness (10–20 mm+) and is more prone to cupping or bowing. For stone, use thicker clips (3–5 mm) to accommodate irregular backs and distribute pressure evenly. Because dense stone absorbs less moisture, it also requires modified thin-set mortar and a larger-notch trowel for proper adhesion. A mismatched clip—too thin to level fully or too thick to seat correctly—can compromise performance. Always verify nominal tile thickness and choose a kit explicitly rated for that range; some include a built-in gauge to confirm compatibility and reduce installation risk.
Large-Format Tiles (12×24+): Why Standard Kits Fall Short and When Heavy-Duty Systems Are Essential
Standard tile leveler kits often lack the clamping force required for tiles larger than 12×24 inches. The expanded surface area magnifies minor inconsistencies, and the weight of large-format tiles demands higher, more sustained pressure to eliminate lippage. Heavy-duty systems address this with reinforced polymer or metal clips, oversized wedges or spin caps, and high-leverage pliers designed for tiles 8–12 mm thick—or more. They also require clips every 12–16 inches along each joint, far exceeding the spacing supported by entry-level kits. Thin plastic clips can fracture under load or slip during mortar cure, leading to misalignment. Worse, insufficient leveling increases the risk of tenting as mortar shrinks unevenly. For projects involving 24×48-inch or larger tiles, invest in a heavy-duty kit rated for your tile’s maximum thickness and weight. Look for one that includes a durable, ergonomic tensioning tool—this ensures consistent force application and long-term reliability. The added cost pays for itself in reduced rework and a truly professional finish.
Comparing Tile Leveler Kit Mechanisms: Wedge-and-Clip, Spin-Cap, and Strap-Based Systems
Operational Differences, Installation Speed, and Learning Curve
Wedge-and-clip systems use a reusable wedge inserted into a disposable clip, tightened with specialized pliers. While offering strong, predictable force, they carry a steeper learning curve—especially for consistent torque application. Spin-cap systems replace the wedge with a threaded cap that screws directly onto a post, eliminating the need for pliers and enabling fast, tool-free tightening. This makes them the most intuitive option for DIYers and time-sensitive jobs. Strap-based kits rely on flexible, high-tension straps pulled tight by a cap—ideal for large-format or heavy tiles where maximum clamping force is critical. However, they demand careful alignment to avoid over-tension and potential edge damage. In terms of speed, experienced installers can place 100–200 tiles per hour with either wedge-or spin-cap systems; strap systems are generally slower due to manual tensioning but deliver unmatched holding power where it matters most.
Real-World Trade-offs: Grout-Line Preservation, Break-Off Cleanliness, and Reusability
Break-off cleanliness and grout-line integrity vary significantly by system. Wedge-and-clip kits leave a small plastic stub embedded in the mortar joint; if snapped carelessly, it can chip tile edges or distort grout lines. Spin-cap systems allow the cap to be unscrewed and reused—leaving no residue in the joint and preserving grout integrity. Similarly, strap-based kits reuse the cap while the strap itself is single-use; their break-off tabs are engineered to snap flush below the tile surface, minimizing lippage risk and cleanup effort. Reusability further distinguishes them: wedge-and-clip wedges are fully reusable, but clips are disposable; spin-cap systems offer the highest reuse potential—many manufacturers design both caps and bases for dozens of installations. According to industry data from a leading supplier, spin-cap kits can reduce material waste by up to 40% on large-scale projects compared to disposable alternatives.
Evaluating Value Beyond Price: Durability, Reusability, and Kit Completeness
A low sticker price rarely reflects true value in tile leveling. Durability dictates how many jobs a kit survives: brittle plastic components crack under repeated clamping, while reinforced polymer or metal parts withstand heavy use across dozens of installations. Reusability directly lowers per-project cost—spin-cap and wedge-and-clip systems both support multi-use tensioning elements, but only spin-cap designs typically allow full reuse of both cap and base. Kit completeness is equally decisive: a box missing pliers, spacers, or sufficient clips forces costly add-on purchases that erase initial savings. When comparing options, assess not just unit cost—but included item count, break-off reliability, and whether replacement parts (e.g., spare caps, straps, or clips) are available. These factors collectively define total cost of ownership far more accurately than upfront price alone.
FAQ
- What is lippage, and why is it important to eliminate? Lippage refers to the uneven height difference between adjacent tiles. It impacts the visual appeal and safety of tiled surfaces, making elimination crucial for professional-looking installations.
- Can beginners use tile leveler kits effectively? Yes, tile leveler kits are designed for ease of use, even for beginners. They simplify tile alignment during adhesive curing, reducing manual fine-tuning.
- How do I choose the right tile leveler kit for my tiles? Match the kit to your tile type, thickness, and format. Kits with adjustable clamping force work well for rectified porcelain tiles, while heavy-duty systems are ideal for large-format tiles.
- Are spin-cap systems reusable? Yes, spin-cap systems often allow both caps and bases to be reused, making them cost-effective for multiple projects.
- What are the benefits of heavy-duty tile leveler kits? Heavy-duty kits provide reinforced components and higher clamping force, essential for eliminating lippage in large-format or heavy tiles.
