 EN
EN

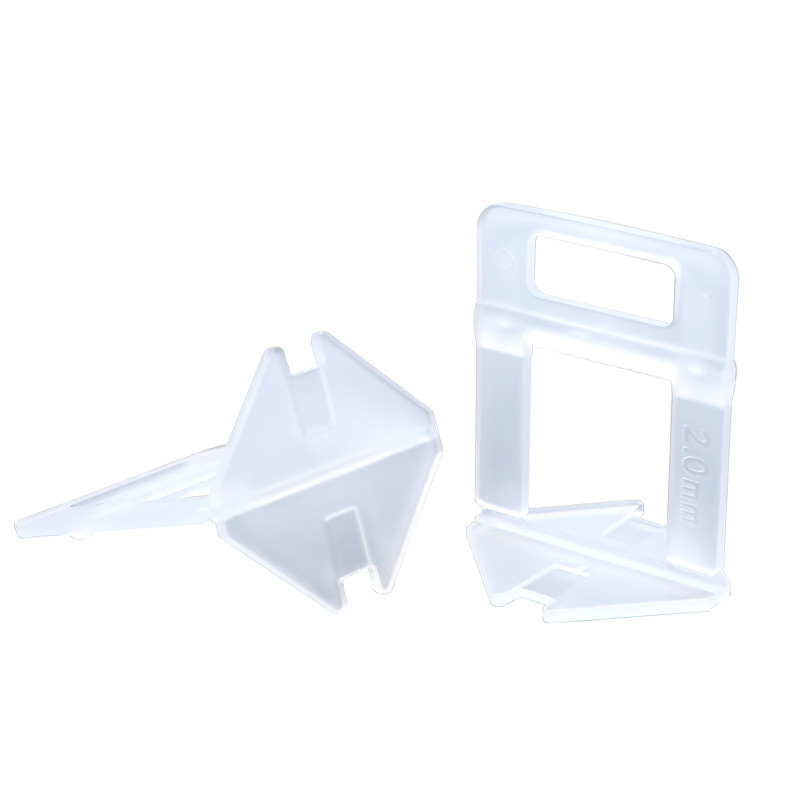
What Is a Tile Leveler and Why It Eliminates Lippage
A tile leveler is a mechanical system that holds adjacent tiles at an even height while the adhesive cures. It consists of clips, wedges, and pliers. Clips slide under tile edges, and wedges are driven into them to apply controlled downward pressure—gently aligning surfaces and eliminating lippage: the uneven height difference between tiles that compromises aesthetics, safety, and longevity. Unlike manual leveling, this system locks tiles in place during critical early-set stages, compensating for minor tile warpage and adhesive shrinkage. The result is a consistently flat surface with uniform grout joints—enhancing both visual appeal and structural integrity.
Preparing the Surface and Materials for Reliable Tile Leveler Performance
The foundation of any flawless tile installation lies in meticulous surface preparation. A tile leveler system corrects only minor height variations—it cannot overcome major substrate flaws. Skipping proper prep invites lippage, hollow spots, and eventual tile detachment, undermining the entire purpose of leveling.
Substrate Flatness, Thinset Consistency, and Back-Buttering for Optimal Adhesion
Begin by cleaning the subfloor thoroughly—removing dust, debris, and grease. Use a 6-foot straightedge to verify flatness; deviations exceeding 1/8 inch over 10 feet require correction with a self-leveling underlayment. Mix thinset precisely per manufacturer instructions: too stiff weakens adhesion; too wet causes tiles to sink or slump. Apply it with a notched trowel held at a consistent 45-degree angle to create uniform ridges. For large-format tiles (24 inches or larger), back-buttering is essential—troweling a thin, even layer onto the tile’s reverse ensures full contact and eliminates voids. Let the mortar reach its initial set before inserting clips—this prevents bond-line disruption and allows the leveler to function as intended. Proper preparation isn’t optional—it’s what enables the leveler to deliver reliable, long-term results.
Installing the Tile Leveler System: Clip, Wedge, and Cap in Sequence
Strategic Clip Placement: Spacing, Edge Alignment, and Tile Size Considerations
Place clips under each tile corner and at midpoints along edges to ensure balanced pressure distribution. Position them at least two inches from corners and no more than six inches apart along edges. For porcelain tiles 24 inches or larger, use six clips per tile—a standard endorsed by the Tile Council of North America (TCNA) Handbook and confirmed in 2023 industry surveys. Align clip openings precisely along continuous grout lines to preserve consistent joint widths across the layout. Insert each clip vertically beneath the tile edge without disturbing the thinset bond line—precision here directly reduces lippage risk.
Wedge Insertion and Cap Engagement Using Tile Leveler Pliers
Insert wedges fully through clip openings until firm resistance is felt against the tile surface. On compatible systems, thread caps clockwise onto posts until snug. Then, using dedicated tile leveling pliers, gradually tighten—alternating between wedges or caps in an overlapping sequence to evenly distribute tension. Per adhesive manufacturers’ guidance, complete tightening within 11 minutes of thinset application to maximize effectiveness. Stop immediately once tiles are flush with neighbors; overtightening stresses the bond and may cause micro-fractures. When executed correctly, this method cuts installation time by over 45 minutes per 100 square feet compared to traditional hand-leveling techniques.
Removing the Tile Leveler System Safely and Avoiding Common Pitfalls
Optimal Removal Timing, Tool Angle, and Preventing Adjacent Tile Disturbance
Removal timing is critical: wait until the thinset reaches its initial set—typically 12–24 hours after installation—but before grouting begins. Removing too early risks tile movement; too late invites damage or bond compromise. Use a rubber mallet angled perpendicular (90 degrees) to the tile surface when tapping clips loose—this directs force straight down, minimizing lateral stress on neighboring tiles. Never use chisels, pry bars, or excessive leverage: research from the 2023 Tile Installation Survey shows 40% of post-installation lippage stems from improper removal techniques. Prioritize steady, even pressure for clean, chip-free extraction—and preserve the precision you worked so hard to achieve.
FAQ
What is lippage in tile installation?
Lippage refers to the height difference between adjacent tiles, which can compromise the appearance, safety, and durability of a tiled surface.
Why is proper surface preparation important for tile leveling?
Proper preparation ensures a flat and clean substrate, allowing the tile leveler system to function effectively and preventing issues like lippage and tile detachment.
How many clips should be used per tile?
For large porcelain tiles (24 inches or larger), the Tile Council of North America recommends using six clips per tile for optimal pressure distribution and alignment.
When should the tile leveler system be removed?
The system should be removed 12–24 hours after installation, once the thinset reaches its initial set but before grouting begins, to prevent tile movement or damage.
Can I reuse tile leveler clips and wedges?
Wedges are typically reusable, but clips are single-use since they are broken during the removal process.
